Singer Patchwork Sewing Machine Manual: A Comprehensive Guide
This manual serves as your trusted guide for operating and maintaining your Singer Patchwork machine‚ ensuring safety and success in all your sewing endeavors.
Welcome to the world of patchwork with your new Singer machine! Specifically designed for quilters and patchwork enthusiasts‚ this machine offers features to streamline and enhance your creative process. This manual will guide you through everything from initial setup and threading to advanced techniques like free-motion quilting and foundation paper piecing.
The Singer Patchwork machine isn’t just a sewing machine; it’s a partner in bringing your fabric visions to life. We’ll cover essential safety precautions‚ detailed parts identification‚ and troubleshooting tips to ensure a smooth and enjoyable sewing experience.
Prepare to unlock a realm of possibilities‚ crafting beautiful and intricate designs with confidence and precision. Let’s begin your patchwork journey!
Understanding the Machine’s Specific Features for Patchwork
Your Singer Patchwork machine boasts several features tailored for precision quilting. An extended throat space provides ample room for larger quilts‚ while the even feed system ensures consistent fabric handling‚ crucial for accurate seams. Many models include a needle-down function‚ allowing for precise pivoting and intricate designs.
The adjustable presser foot pressure is vital for working with varying fabric thicknesses‚ preventing puckering or slipping. Specialized presser feet‚ often sold separately‚ further enhance capabilities – a walking foot for even feeding and a ¼ inch foot for precise quilting are particularly useful.
These features combine to deliver a superior patchwork experience‚ simplifying complex projects and yielding professional-quality results.
Safety Precautions & General Machine Setup
Prioritize safety when operating your Singer Patchwork machine. Always disconnect the power cord before threading‚ changing the needle‚ or performing any maintenance. Keep fingers away from the needle while sewing. Never force the fabric; let the machine feed it naturally.
For setup‚ ensure the machine is on a stable‚ level surface. Connect the power cord and foot control. Familiarize yourself with the power switch and speed control. Properly install the bobbin (refer to the bobbin threading guide) and thread the upper thread following the designated path.
Regularly inspect the power cord for damage and avoid using it if frayed.
Essential Parts Identification
Understanding your Singer Patchwork machine’s components is crucial. Key parts include the power switch‚ handwheel‚ speed control‚ bobbin winder‚ thread spool pin‚ tension dial‚ needle clamp‚ presser foot‚ presser foot lever‚ feed dogs‚ and bobbin case.
The needle bar holds the needle‚ while the presser foot secures fabric during stitching. The feed dogs move the fabric under the needle. The bobbin case houses the lower thread‚ creating the stitch with the upper thread.
Locate the reverse lever for backstitching and the stitch length/width dials for adjusting stitch parameters. Familiarize yourself with these parts for efficient operation.
Needle & Presser Foot System
The needle and presser foot work in harmony for precise stitching. Singer Patchwork machines utilize a variety of needle sizes (80/12‚ 90/14 are common) depending on fabric weight. Ensure the correct needle type – universal‚ ballpoint‚ or sharp – is used for your material.
Presser feet are interchangeable; a standard foot is for general sewing‚ while a ¼ inch foot is ideal for accurate patchwork seams. A walking foot aids in feeding multiple layers evenly‚ preventing shifting.
Proper needle insertion and secure tightening are vital. Regularly check the needle for damage and replace as needed. Correct presser foot pressure ensures even fabric feed.
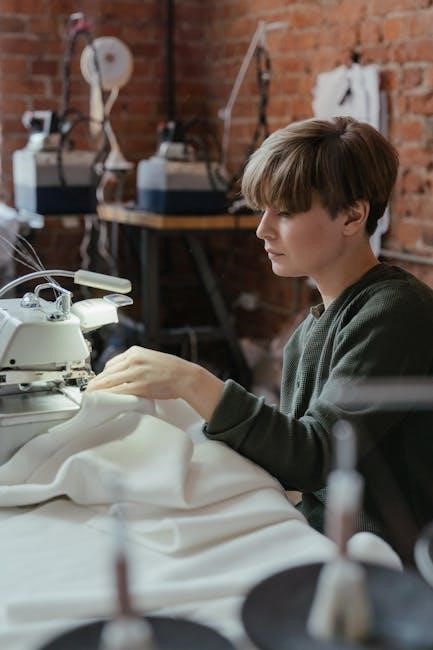
Bobbin Winding & Threading
Consistent bobbin winding is crucial for even stitch formation. Begin by placing the thread spool on the spool pin and guiding the thread through the tension disc. Wind the bobbin evenly‚ ensuring it isn’t too tightly or loosely wound.
Threading the bobbin involves inserting it into the bobbin case‚ ensuring it rotates freely. The thread path for the bobbin varies by model; consult your machine’s diagrams.
Proper bobbin threading prevents skipped stitches and tangles. Always use quality thread and check for any obstructions during the winding and threading process.
Tension Control Explained
Achieving balanced tension is vital for beautiful‚ durable seams. The upper tension controls the thread coming from the spool‚ while the bobbin tension manages the lower thread. Incorrect tension leads to looping‚ puckering‚ or thread breakage.
Start with the recommended tension settings in your manual – typically ‘4’ for both upper and bobbin. Test sew on scrap fabric. If loops form on the underside‚ increase upper tension.
If puckering occurs‚ loosen the upper tension or slightly tighten the bobbin tension. Adjust in small increments‚ retesting after each change. Consistent tension ensures professional-looking patchwork.
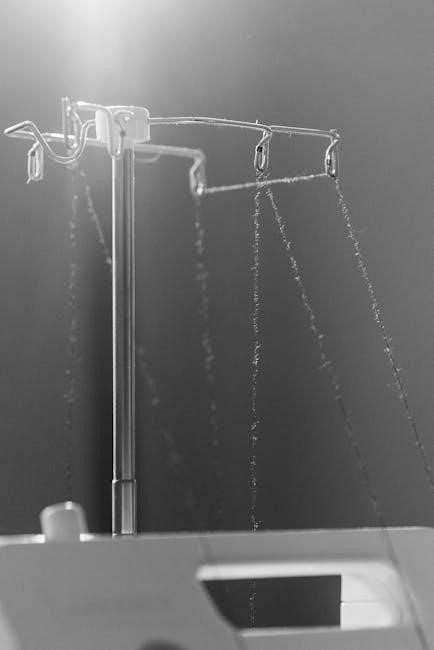
Threading the Singer Patchwork Machine
Proper threading is crucial for smooth operation. Begin by ensuring the machine is off and the presser foot is raised. Follow the numbered threading path illustrated in your machine’s manual – typically starting with the spool pin‚ then through various guides‚ and finally the needle.
Pay close attention to the take-up lever; the thread must pass through it. Incorrect threading causes skipped stitches and tension issues. Simultaneously‚ ensure the bobbin is correctly inserted and threaded‚ as detailed in the lower threading guide.
Always pull a sufficient length of thread through the needle before starting to sew.
Upper Threading Guide
Begin with the spool pin‚ ensuring your thread unwinds smoothly. Next‚ guide the thread down through the first thread guide‚ often a small metal hook. Continue following the numbered path‚ leading to the tension discs – crucial for consistent stitch quality. Verify the thread is securely seated between the discs.
Proceed upwards to the take-up lever‚ a moving component that controls thread flow. The thread must be properly engaged with the lever. Finally‚ thread the needle from front to back (consult your manual if unsure). A needle threader can be helpful!
Lower Threading (Bobbin) Guide
Start by correctly winding a bobbin with thread‚ ensuring it’s not too tightly or loosely wound. Most Singer Patchwork machines feature a bobbin winding mechanism – consult your manual for specifics. Once wound‚ insert the bobbin into the bobbin case‚ following the diagram printed on the machine.
Guide the thread through the tension spring of the bobbin case‚ ensuring it ‘clicks’ into place. Then‚ carefully insert the bobbin case into the shuttle hook. Finally‚ draw up a few inches of thread through the needle plate opening. Proper bobbin threading is vital for balanced stitches!
Basic Stitch Selection & Settings
Your Singer Patchwork machine offers a variety of stitches‚ but mastering the basics is key. The stitch selection dial allows you to choose from options like straight stitch‚ zigzag‚ and potentially decorative stitches. For patchwork‚ the straight stitch is fundamental – typically set to a stitch length of 2.5mm for secure seams.
The zigzag stitch is useful for finishing raw edges or creating decorative elements. Experiment with stitch width and length settings to achieve different effects. Always test your stitch settings on scrap fabric before starting your project to ensure optimal results and prevent errors.
Straight Stitch for Patchwork
The straight stitch is the cornerstone of most patchwork projects. On your Singer Patchwork machine‚ select the straight stitch option using the stitch selection dial. A standard stitch length for patchwork is typically between 2.5mm and 3.0mm‚ providing a secure and durable seam without being overly dense.
Adjusting the stitch length slightly can impact the fabric’s drape and the seam’s strength. Shorter stitches are ideal for delicate fabrics or curves‚ while longer stitches work well for straight seams with heavier materials. Always test on scraps!
Zigzag Stitch Applications
The zigzag stitch offers versatility beyond basic seams on your Singer Patchwork machine. Utilize it for finishing raw edges to prevent fraying‚ creating decorative elements‚ or applying appliqué pieces. A narrow zigzag (width 1.0-2.0mm‚ length 2.0-2.5mm) is excellent for edge finishing.
For appliqué‚ a wider zigzag (width 3.0-4.0mm‚ length 2.0mm) can create a decorative border. Experiment with different widths and lengths to achieve varied effects. Remember to test stitch settings on scrap fabric before applying to your project to ensure desired results and prevent puckering.
Adjusting Stitch Length & Width
Precise stitch control is crucial for patchwork. Your Singer Patchwork machine allows adjustment of both stitch length and width via dedicated dials or digital controls. For standard patchwork‚ a stitch length of 2.5mm is a good starting point‚ offering a secure yet flexible seam.
Shorter stitch lengths (e.g.‚ 2.0mm) are ideal for delicate fabrics or curves‚ while longer lengths (e.g.‚ 3.0mm) suit thicker materials. Width adjustments primarily affect zigzag stitches; wider settings create broader coverage‚ useful for decorative applications or reinforcing seams. Always test adjustments on scrap fabric!
Patchwork-Specific Techniques
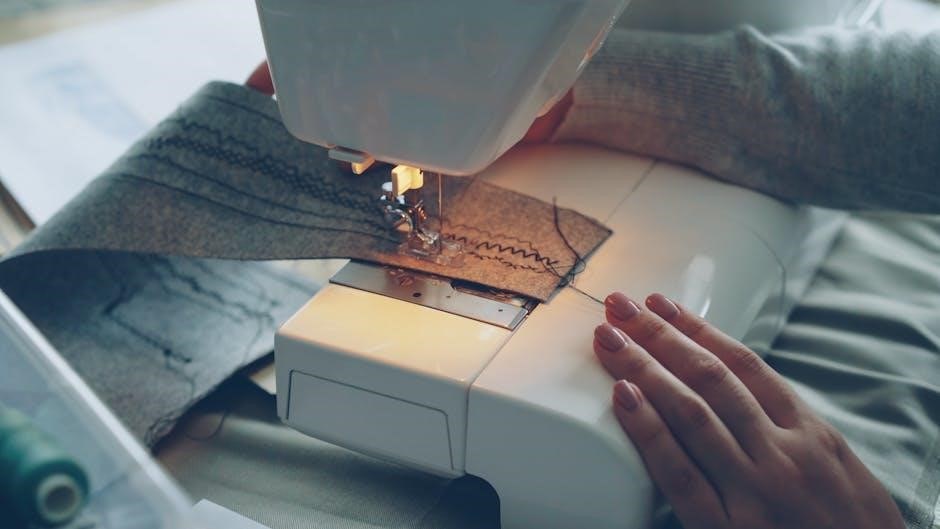
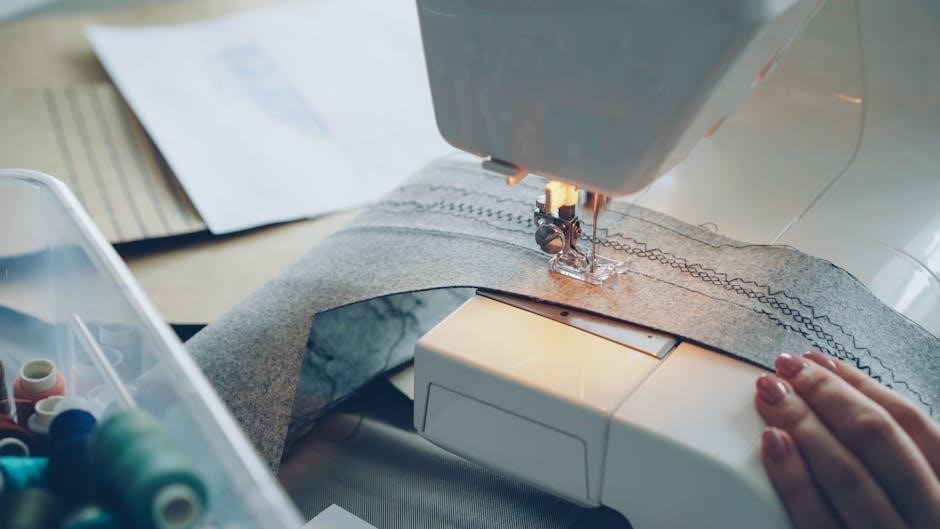
Unlock your machine’s full potential with techniques tailored for patchwork. Foundation paper piecing gains accuracy using a consistent quarter-inch seam‚ easily achieved with a dedicated foot. Explore free motion quilting – lower the feed dogs and use a darning foot for creative designs; practice smooth‚ even movements on a practice quilt sandwich.
A walking foot is invaluable for evenly feeding multiple layers of fabric‚ preventing shifting and puckering‚ especially with batting. Mastering these techniques will elevate your patchwork projects‚ ensuring professional-looking results and expanding your creative possibilities.
Foundation Paper Piecing with the Machine
Achieve precise patchwork blocks using foundation paper piecing. Begin by basting the paper template to the wrong side of your fabric. Stitch along the marked lines‚ carefully flipping and pressing each section as you go. A consistent quarter-inch seam allowance is crucial for accurate results; utilize a quarter-inch foot for precision.
Ensure consistent stitch length and gentle handling of the paper to avoid tearing. This technique allows for intricate designs and sharp points‚ perfect for complex quilt patterns. Remove the paper carefully once all sections are stitched‚ revealing a beautifully pieced block.
Free Motion Quilting Setup & Practice
Unlock creative quilting possibilities with free motion quilting! First‚ drop your feed dogs and attach a darning foot. Lower the presser foot slightly‚ allowing the fabric to move freely. Practice on scrap fabric to develop muscle memory and control. Maintain a consistent speed and gentle guidance; let the machine do the work.
Experiment with different stitch lengths and thread weights to achieve desired effects. Start with simple designs like loops or swirls‚ gradually progressing to more complex patterns. Consistent tension is key – adjust as needed for smooth stitching.
Using a Walking Foot for Even Fabric Feeding
Achieve precise patchwork results with a walking foot! This essential accessory ensures even fabric feeding‚ preventing shifting and puckering‚ especially when working with multiple layers or bulky fabrics. Attach the walking foot securely to your machine‚ ensuring it’s properly aligned.
The walking foot’s upper and lower feed dogs work in tandem‚ gripping all fabric layers simultaneously. This is ideal for quilting‚ binding‚ and sewing slippery or stretchy materials. Practice on scrap fabric to adjust your sewing speed and tension for optimal results.
Troubleshooting Common Issues
Encountering problems? Don’t worry‚ many issues are easily resolved! Thread breakage often stems from incorrect threading‚ a dull needle‚ or improper tension. Skipped stitches can indicate a bent needle‚ incorrect needle size for the fabric‚ or timing issues. Always re-thread the machine and replace the needle first.
Needle breakage frequently occurs with excessive force‚ using the wrong needle type‚ or attempting to sew through too many layers. Consult the manual for appropriate needle selection. If problems persist‚ refer to the detailed troubleshooting section or seek professional assistance;
Thread Breakage Problems
Frequent thread breakage is frustrating‚ but often easily fixed. First‚ ensure correct threading – follow the manual’s diagram meticulously. A dull or damaged needle is a common culprit; replace it with a fresh one of the correct type and size for your fabric. Incorrect tension‚ particularly upper tension too tight‚ can also cause breaks.
Check the bobbin winding; uneven winding leads to weak spots. Finally‚ ensure you’re using quality thread. Cheap thread frays easily. If the issue continues‚ slightly loosen the upper tension and re-thread both the machine and bobbin.
Skipped Stitches & Solutions
Skipped stitches indicate a problem with the needle‚ threading‚ or timing. Begin by verifying the needle is correctly inserted – it must be fully pushed up into the needle clamp. Ensure you’re using the appropriate needle type and size for your fabric weight; a ballpoint needle is crucial for knits. Re-thread the machine‚ paying close attention to the thread path and ensuring the presser foot is up.
Check the bobbin is correctly inserted and the thread flows smoothly. If problems persist‚ a slightly bent needle can cause skips; replace it. Finally‚ consider the fabric – very thick or stretchy fabrics may require adjustments.
Needle Breakage & Prevention
Needle breakage is often preventable with proper technique and maintenance. Always use the correct needle type and size for your fabric; forcing a needle through thick material is a common cause. Ensure the needle is fully inserted into the clamp and tightened securely. Avoid sewing over pins – this is a major cause of breakage and machine damage.
Regularly inspect your needle for bends or dullness; a damaged needle is prone to breaking. Never pull or push the fabric while sewing; let the machine feed the fabric naturally. Finally‚ ensure proper threading and tension settings to avoid undue stress on the needle.
Machine Maintenance & Cleaning
Regular maintenance extends your Singer’s life and ensures optimal performance. Frequent cleaning prevents lint and dust buildup‚ which can cause malfunctions. Always unplug the machine before cleaning! Use a soft brush to remove lint from the bobbin area and feed dogs. A small vacuum cleaner attachment can also be helpful.
Periodic oiling of designated points (refer to your machine’s diagram) keeps moving parts lubricated. Avoid over-oiling‚ as this attracts more dust. Wipe down the exterior with a damp cloth. Consistent care prevents issues and keeps your patchwork machine running smoothly for years.
Regular Oil Points & Lubrication
Proper lubrication is crucial for a smoothly operating Singer Patchwork machine. Consult your machine’s specific diagram – typically found inside the manual or on the machine itself – to identify designated oil points. These usually include the bobbin race‚ hook assembly‚ and various linkages.
Use only sewing machine oil; never use household oil‚ as it can gum up the mechanism. Apply oil sparingly‚ one drop at a time‚ and wipe away any excess. Over-oiling attracts lint. Regular oiling‚ ideally after every 8 hours of use‚ minimizes friction and prevents wear‚ extending your machine’s lifespan.
Cleaning the Bobbin Area
A clean bobbin area is essential for consistent stitch quality. Lint and thread fragments accumulate here‚ causing tension issues and potential jams. Begin by removing the bobbin case. Use a small brush – often included with your machine – to gently dislodge lint from the bobbin case and the surrounding race.

A vacuum cleaner with a brush attachment can also be helpful‚ but use low suction. Avoid using compressed air‚ as it can push debris further into the mechanism. Regularly cleaning this area‚ ideally with each bobbin change‚ ensures smooth operation and prevents frustrating sewing problems.
Dust Removal & General Care
Regular dust removal is crucial for maintaining your Singer Patchwork machine’s longevity and performance. Dust buildup can cause friction‚ overheating‚ and ultimately‚ malfunctions. Use a soft brush or a lint-free cloth to gently wipe down the exterior of the machine‚ paying attention to areas around the needle plate and bobbin cover.
Cover the machine when not in use to prevent dust accumulation. Periodically‚ inspect the internal components for dust‚ but avoid disassembling the machine unless you are comfortable doing so. Consistent care extends the life of your machine and ensures years of reliable service.
Advanced Features & Accessories
Explore the full potential of your Singer Patchwork machine with its advanced features and optional accessories. Consider investing in specialized presser feet‚ such as a ¼-inch foot for precise quilting‚ or a walking foot for handling multiple fabric layers with ease.
If your model includes a knee lift‚ mastering its use can significantly improve your sewing speed and control. These enhancements unlock new creative possibilities. Singer offers a wide range of compatible accessories designed to elevate your patchwork projects‚ enhancing both efficiency and the quality of your finished work.
Optional Presser Feet for Patchwork
Enhance your patchwork precision with Singer’s range of optional presser feet. The ¼-inch foot is invaluable for creating accurate seams‚ essential for quilt blocks and precise piecing. A walking foot ensures even fabric feeding‚ preventing shifting and puckering when working with multiple layers or bulky fabrics.
For free-motion quilting‚ an open-toe foot provides excellent visibility. A blind hem foot is useful for neat finishes. Investing in these specialized feet expands your machine’s capabilities‚ allowing for greater control and professional-looking results in all your patchwork endeavors.

Using the Knee Lift (if applicable)
If your Singer Patchwork machine features a knee lift‚ it offers hands-free presser foot control‚ significantly boosting efficiency‚ especially during free-motion quilting or intricate patchwork. By gently pressing your knee against the lever‚ you raise and lower the presser foot‚ keeping both hands available to guide the fabric.
This technique allows for smoother‚ more consistent movement‚ crucial for detailed quilting designs. Practice coordinating your knee lift with the machine’s speed to achieve optimal control. Remember to adjust the knee lift tension if needed for comfortable operation.
Finding Replacement Parts & Manuals Online
Locating replacement parts and manuals for your Singer Patchwork machine is readily achievable online. Singer’s official website provides a comprehensive resource section‚ often including downloadable manuals for various models and a parts finder tool. This tool allows you to identify specific components based on your machine’s serial number.
Numerous third-party suppliers also specialize in vintage and current Singer parts. Websites like SewParts Online and eBay frequently offer a wide selection. Always verify compatibility before purchasing. Digital copies of manuals are often available on these sites as well‚ offering valuable support and guidance.
Singer’s Official Website Resources
Singer’s official website is the primary hub for all your machine-related needs. You’ll find a dedicated ‘Support’ section brimming with resources‚ including downloadable manuals specifically for the Patchwork model. Utilize the ‘Parts’ finder‚ requiring your machine’s serial number for accurate component identification and ordering.
Frequently Asked Questions (FAQs) address common issues‚ and a robust knowledge base offers troubleshooting tips. Singer also provides online tutorials and videos demonstrating various techniques. Registration of your machine unlocks access to exclusive content and updates. Explore the ‘Owner’s Club’ for community forums and expert advice‚ fostering a collaborative learning environment.
Third-Party Manual & Parts Suppliers
Beyond Singer’s official channels‚ several reputable third-party suppliers offer manuals and replacement parts. Websites like SewingPartsOnline and Amazon frequently stock Singer Patchwork components‚ including needles‚ bobbins‚ and presser feet. Manuals Liberty provides digitized versions of older manuals‚ potentially useful if your original is lost.
eBay can be a source for both new and used parts‚ but exercise caution and verify seller ratings. Before purchasing‚ cross-reference part numbers to ensure compatibility. Remember that using non-genuine parts may void your machine’s warranty‚ so consider this carefully. Always prioritize quality and reliability when sourcing components.

Appendix: Stitch Guide & Fabric Recommendations
For optimal patchwork results‚ utilize a straight stitch with a length of 2.5mm for most seams; A slightly shorter stitch (2.0mm) enhances durability in high-stress areas. Zigzag stitches are ideal for finishing raw edges and decorative applications. When working with quilting cottons‚ a size 80/12 needle is generally recommended.
For heavier fabrics like denim or canvas‚ switch to a 90/14 needle. Test stitch on scraps before beginning your project. Consider using a walking foot for consistent fabric feed‚ especially with multiple layers or slippery materials. Always pre-wash fabrics to prevent shrinkage and color bleeding.